
Lesson Four: Watercolor Resists
"You'll never be bored when you try something new. There's really no limit to what you can do!" -Dr Seuss
This week, I wanted students to build on what we learned about last week but also to give them a chance to try a new method of art and explore their creativity. We started by reviewing last week's lesson (the color wheel) and going over what primary, secondary, warm, and cool colors are. I mentioned the medium we used today: watercolor, and asked if anyone has used it before. Then, I prompted students to think about the type of paint we used last week (tempera) and asked them how it is different than watercolor paint, and why sometimes we use watercolor paint instead. The students were very quick and insightful in their answers- saying that watercolors aren't as heavy or 'goopy' and can be used for a smoother look. We looked at some examples of watercolor paintings and identified differences in this type of medium.
 |
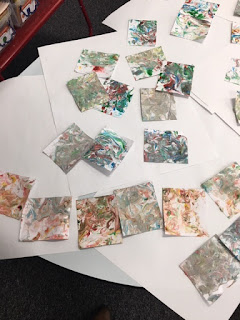
| If you look really closely at the 'salt resist' side, you'll see tiny white dots where the watercolor paint is resisting or bouncing away from the salt granules. |

 Next, we discussed where fish live. We decided that fish live in either saltwater (ocean) or freshwater (ponds, streams, lakes, etc). Since we wanted to include a salt resist on our paintings, we decided our fishes would be swimming in saltwater. I explained that in order for the salt resist to work well, the paint/paper needed to be fairly wet. I modeled this by painting my paper with lots of blue paint as well as plain water. My mentor teacher- Vicki Gehring- had the great suggestion to have the students first paint their entire paper with water before adding any paint in order to keep it wet. As the students started painting, I went around and sprinkled salt on their 'water' and they watched the paint bounce away from the salt granules. Looking back, it took a while for the salt resist to take effect, so I might look into getting bigger salt granules that would have a faster and more evident effect. Even with the 'water' part of this assignments, the students were unique in how much water they added to the paint, if they added any other cool accent colors, and their brushstrokes. Every single artwork looked different!
After we cleaned up and laid our paintings to dry, we reviewed the lesson. I asked students the types of resists that we worked with today, the type of paint we worked with, and what surprised them and what they learned. It was evident in their answers that they really grasped the idea of how we can create watercolor resists using wax and salt, and why we might use watercolor paint for certain projects. I'm excited for next week to see more of their creativity shine through!
**I've posted a link to my lesson plan for this week under the 'Resources' page of this blog.


Comments
Post a Comment